Mapping a live coding workshop for digital delivery (part 2)
With the advent of COVID-19 we’re all having to do the unthinkable, which for an instructor like me means moving hands-on, practical coding workshops online. I’ve already written a post with a student-facing map of the process (and some tips for students), but I wanted to focus on a few instructor-related aspects of the map in this post.
My personal teaching setup
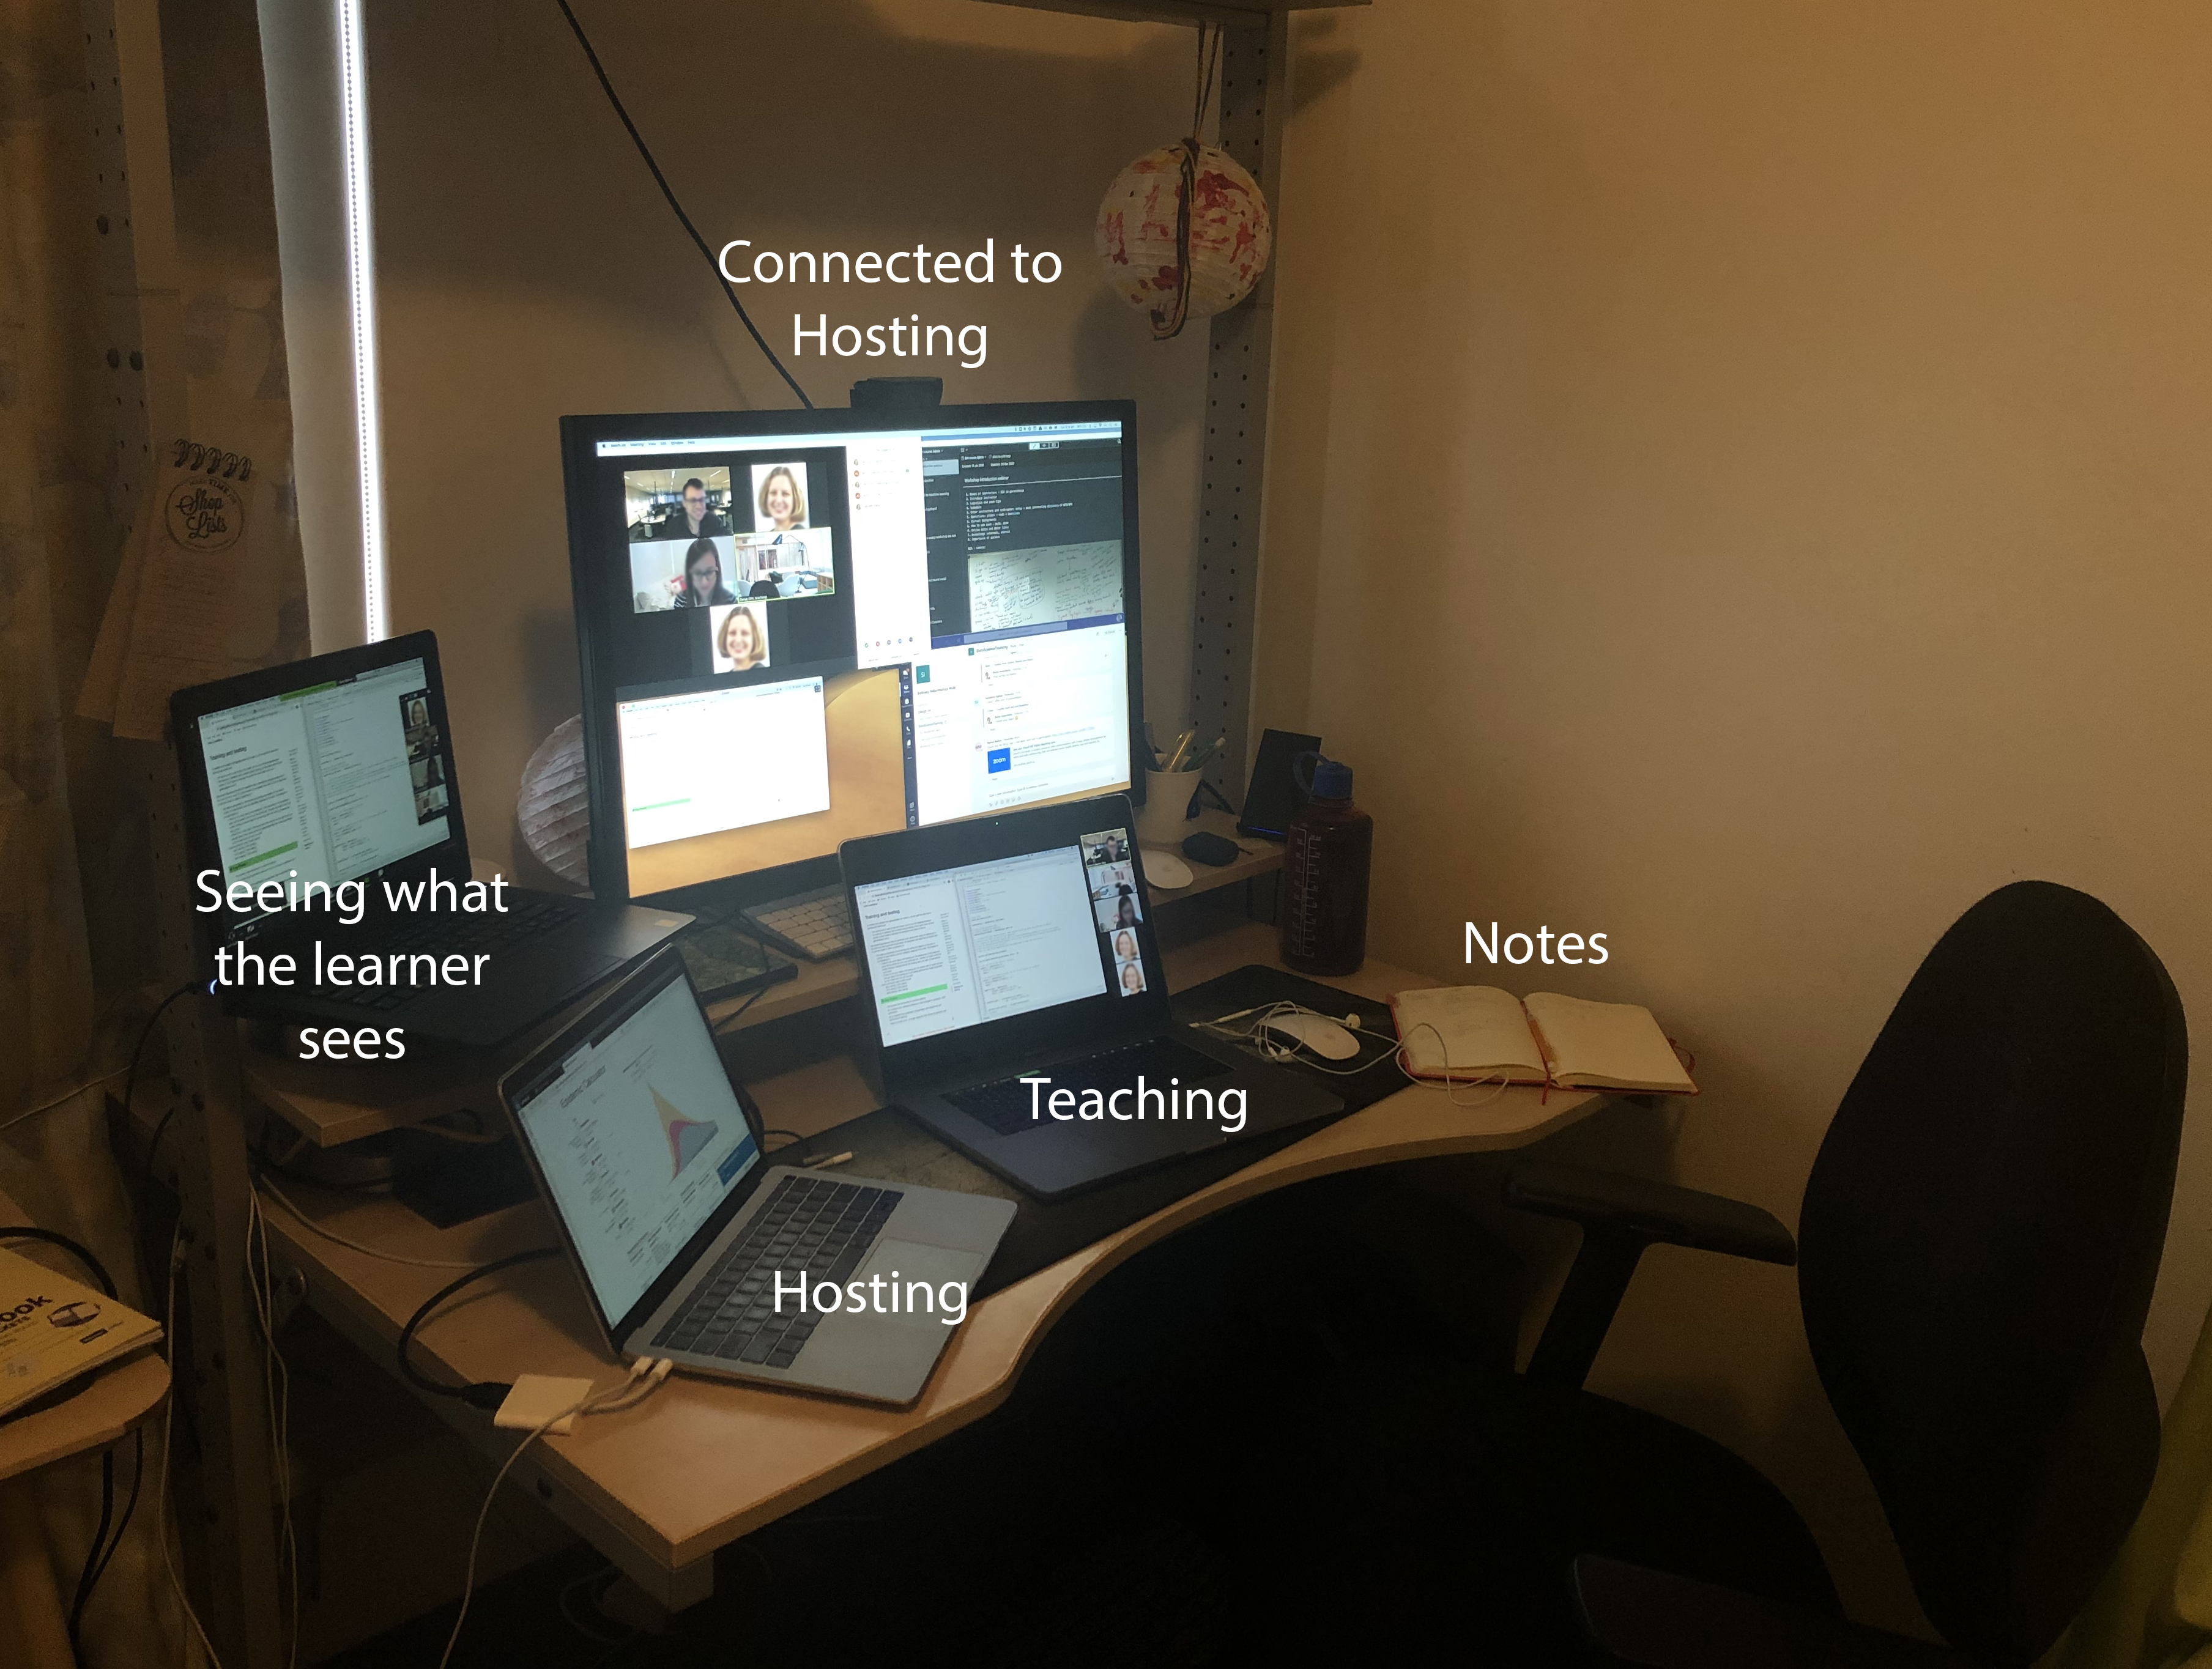
I’m incredibly lucky to have access to several machines, which I use to work through materials on all of the platforms and also while teaching.
During live teaching, we use two machines: (1) a shared “training” laptop on which we live code or show slides, connected to the projector all day, and (2) our own individual machines, which we use for looking at the notes.
For teaching online, I use:
- A primary machine, with a good camera, as my teaching machine. This has a vanilla setup of RStudio and/or Jupyter, notifications are turned off and all I can see are the things I need to teach. This laptop has only the one, built-in screen.
- A secondary machine, a.k.a. my command centre. This machine has my back-channel open, Zoom gallery view (I log in twice to the training) so I can see my learners, Zoom chats and Participants all visible. My notes are printed out on paper, as I have enough screens and windows to try to juggle.
- A third machine, which has one (small-ish) screen, and shows me what a learner with only one laptop/desktop screen is seeing. This is not essential, but helps me adjust font sizes and window widths to make sure people can actually live code along with me, without needing to rely on my co-instructors (I still ask students if it’s OK, of course, but this helps me self-adjust faster).
- I use an iPad if I need access to whiteboard (see below).
Back-channel communication: whispering in someone’s ear

You need a quick and easy way to communicate between you and your co-instructors. I recommend a different, secondary chat application for this, for example Microsoft Teams or Slack (or Telegram/Whatsapp - whatever), if you’re using Zoom as your primary teaching tool.
Ideally, you set up two channels in this: one for urgent messages to the instructor who’s teaching (“YOUR SCREEN IS TINY!”), and another for non-teaching instructors to communicate with each other. This allows your helpers to communicate about challenging software installs (“Do you have any experience updating R libraries on Ubuntu?”), delegate responsibilities (“Can you take over host please? I really need a break for 3 minutes!”) and otherwise manage the class - but all of this is not relevant for the instructor who’s teaching and can actually distract them if they keep getting pinged about it.
Common problems: learner with setup challenges

First and foremost, send out detailed setup and installation instructions, complete with screenshots, to your learners several days before the course. Remind them to email you with screenshots of any error messages, or - if you’re teaching a large class - get them to post the screenshots into a shared document, and encourage peers to help.
Second, provide the opportunity for learners who have had issues to join the meeting an hour early and try to get help (yes, this means I’m online at 8 am for a 9 am class).
My preferred way of helping debug issues is to have learners post a screenshot of the error message into a specific place in the shared document we’re using, and for me to guide them in trying to fix it (via the Zoom chat if at all possible - but note it doesn’t work well with line breaks, so you may need to use the shared doc for pasting code as well).
Tools like Zoom do provide the functionality to share screens and take over someone’s desktop, BUT I’ve found taking screenshots is faster, doesn’t require you to jump out into a breakout room (so the learner doesn’t miss out on core content), and doesn’t cause bandwidth problems (I’ve tried taking over learners’ desktops with suboptimal bandwidth, and it kicked both of us out of the session).
Finally, it can be helpful to have a backup cloud platform for teaching as well, as the digital equivalent of spare laptops. We’ve been successful using mybinder.org for python, and have tried but not productionised rstudio.cloud for R. I’d love a suggestion for an online terminal for teaching basic Unix!
Common problems: poor internet connectivity

If you are having issues with your connection, consider (1) switching to slides/screenshare-only mode, (2) ensuring your device has priority on your home WiFi network, (3) trying to teach via a personal hotspot or (4) swapping to another instructor teaching1. This is something you can communicate about with your team via the back-channel - and a key reason the back-channel needs to use very little bandwidth!
For learners, you can try asking them to turn off their video, and possibly also closing other tabs/devices connected to the internet.
Common problems: Tool stack meltdown

EXPECT your primary tool stack to melt down. If you are using Zoom/Teams/GoToMeeting, expect your platform to go down at least once during the training (it’s great if it doesn’t, but you’re prepared if it does!). Have a plan, with your co-instructors, what you’re going to do: switch to another tool? take an off-schedule break? Something else?
Explicitly tell your students how you’ll communicate with them to let them know where to go in the event of a breakdown. For us, I prefer using the shared doc, but an email would also work (albeit might be slower, as they’re hopefully not checking email while we’re teaching).
Shared documents

A shared, student-editable document is essential for successful delivery of training.
My primary criteria for a shared document include:
- It is editable by all students (ideally without logging in),
- It doesn’t take up too much screen real estate,
- It allows you to post images by copy-pasting them in,
- It doesn’t require any cognitive overhead for learners to figure out how to use it.
The official solution recommended by the University of Sydney is a Microsoft Office Online Word document.
I have had success using Google Docs. I provide a link to a public doc, so learners don’t have to log in with their Google Account, and ensure that no student data is collected in the doc (i.e. learners can use first names or pseudonyms only on the doc). Most people have used Docs, so there is no overhead in figuring out how to use the tool - we can just dive in and move on.
There are tools like the Etherpad, hack.md and an open-source, self-hosted version called CodiMD. The latter two support document creation in markdown, which is great because it’s plain text, but also not so great, because it uses more screen real estate than Google docs (especially with the preview pane open side by side with the markdown itself).
What goes in the Doc? My (non-exhaustive) check-list includes:
- The title of the course
- The names of all of the instructors who are part of the teaching team
- Links to the course materials
- Links to any data downloads
- Links to the registration page for the course
- Links to pre and post workshop surveys
- Details about the zoom meeting, and every possible way learners can log onto it
- Links to the setup instructions and tests that setup completed successfully
- [Links to the mybinder or Rstudio cloud instance, if using as a backup]
Code transfer

Sometimes you need to share a chunk of code with your learners. While you can paste it into the shared document or Zoom chat, often these tools will do strange things with spaces and quotes.
Instead, I recommend pasting them into a public GitHub gist, sharing the link with your learners via the chat, and screen sharing how you would access the gist and move it into your R/python session.
Whiteboard
In an in-person live coding class, I often use the whiteboard when answering student questions or working through problems.
Digitally, I’m a lot more hesitant to use one, if only because it takes away screen real estate from the other things I’m doing, which are often more important for the learners to see at the time.
However, I have had success using my iPad and both GoodNotes and Notability when I needed a digital whiteboard, following the instructions here.
I hope these two posts are helpful for you as you prepare to jump into teaching online! Please leave a comment below if you found something useful, unclear or would like to add something else I missed!
Footnotes
This is why we say all instructors have to be able to teach all content! If you think it’s different in-person, ask me about the time I had a massive, I-can’t-stop-even-if-I-try-really-hard coughing fit in the middle of teaching. I literally walked out of the classroom to try not to die in public, waving vaguely to my co-instructor to go on without me (which she very successfully did). That’s also when I discovered, after 20 minutes of searching, that there is no student-accessible hot water tap in the Sydney Uni Quadrangle (!), and was able to soothe my throat only after some kind caterers who were wrapping up for the day shared a pot of hot honey lemon tea.↩︎